
Recording and Playback Setup |
| Introduction:
Setting Up A Record / Playback System
|
 Often, it's nice to be able to record and playback someone's audio so that they can hear what's happening
at their transmitter. It seems like a simple enough task, but there are several factors that will determine the final quality of your reproductions.
Often, it's nice to be able to record and playback someone's audio so that they can hear what's happening
at their transmitter. It seems like a simple enough task, but there are several factors that will determine the final quality of your reproductions.| Connecting The Rec/Playback System Sending the Audio from the Receiver to the Recorder: The cable you will be using for the recording system should be high quality shielded type. I recommend using "Starquad" which is a twisted, four conductor, double shielded type of cable.
This kind of cable is used throughout the recording industry for its low loss, low capacitance and Hum/RFI suppressing characteristics. Since all of the connections that we will be dealing with will be unbalanced, all four wires will
be used on the plus side of the connectors and the shielding to the ground lug.
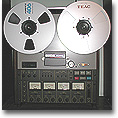
We need to get the received audio to the recorder. The best place to tap the receiver's audio output for recording purposes would be from a fixed line-level output. If you are using this output already for your receiver EQ or another device, you can "Split" the signal with very little loss. Whether you will be sending the received audio to a tape recorder, mini-disc recorder or computer sound card, use the line inputs on these devices, preferably the Left Channel input. Sending the Audio from the Recorder to the EQ: If you will be using a computer based recording system with software that can EQ the audio, see the next section. If you will be EQing your recorded audio, (highly recommended) then you will need
a cable to connect the recorder's output to the EQ's input. This is usually done with RCA connectors and should be pretty straight forward.
Sending the Audio from the EQ or Recorder to the Transmitter: Getting the EQ/Recorder output to the transmitter is the final step in the hookup. I highly recommend sending the EQ/Recorder output to the transceiver's MIC input. Most transceiver's
mic input is flatter in response than their phone patch or accessory inputs because of capacitors that are usually used.
The problem, of course, is that the mic input will already be used by the microphone audio. We could combine the output of the mic rack with the output of the recorder and combine the two, but I don't recommend it. Combining two or more output signals into one input gets messy! It effects the frequency response because of severe impedance mismatches and loading. This is where a mixer comes in handy! If you have one, and have already used a mixer input channel for your audio rack output, then you can select another mixer input channel for the recorder output. Then you can use your mixer to balance the audio levels between your live audio and recorded audio signals and send the main mixer output to the transceiver mic input. If you choose not to use a mixer (not recommended) there is a way to combine the outputs. This will involve sending an output to another output. It sounds strange, but it works! I will explain briefly how to do this... To combine two unbalanced mono signals, connect a cable from the output of your recording device to the output of the last processor that's feeding its output to the transceiver. If the processors output uses a 1/4" Phone jack, then inset a "Y" adapter to the output. The Y-adapter will have a mono 1/4" PLUG to two mono 1/4 JACKS. (Radio Shack part #274-892) Since the output of the last processor is routed to the transceiver's mic input, then inserting another signal into the processors output will end up at the transceiver's mic input also. I would also recommend sending these combined signals to an audio isolation transformer before it gets to the transceiver mic input. This will help reduce ground-loop 60Hz hum and any RFI that may occur. If you are using a 1/4" TRS or XLR balanced output from your last processor to feed the transceiver's mic input, combining this signal with that of the recorders output will result in an unbalanced signal feeding the transceiver's mic input. This is because the recorder's output is unbalanced, and mixing this signal with a balanced signal will unbalance it electrically because of XLR pins 1 & 3 being combined, or because of a 1/4" TRS plug being shorted between Ring & Sleeve. The only way to keep your balanced signal from becoming unbalanced when combining it with an unbalanced signal is to use an isolation transformer that can convert unbalanced to balanced. Then you may combine the two balanced signals and send them on their way to the transceiver. I send my sound card unbalanced output signal to a Jensen 1:1 line output transformer (JT-11-FLCF) and then send the transformer balanced output to one of my mixer main inputs which I can mix with my live rack audio output that gets delivered to my transceiver. This works nicely with good RFI/Hum rejection and isolation. It sounds complicated, but it's really not that bad and it does work. Leave me an e-Mail if you need some assistance. |
| Making A Recording After cabling everything up, you're ready to make a test recording. Find a receive signal that is strong enough to record. The better the signal, the better the recording will be. Turn your RF
receive gain down so that the target receive signal is only about 10 or 20dB stronger than the default meter position when all is quiet. You could pre-adjust your RF gain so that your meter shows about S9 when your receiver is quiet
and just leave it there.
Adjust your AGC to its slowest position so that you will not be recording a signal that's pumping the receiver. Adjust your recording level appropriately and start the recording. If you will be using a sound card and software that can Post-EQ (FFT) the recording, I recommend keeping the recording levels very conservative to about -9dB because of an FFT amplitude increase when EQ'd later. Otherwise you can record up to 0dB. |
| Equalizing For Playback "Why?"...You may ask... If a recording device is accurate, (most are) and the receiver is flat, then why EQ the playback? If your transmitter is perfectly flat and has the same bandwidth as the receiver, or you
will only be playing back a station who's audio is only 2.4kHz wide in frequency response, then my answer is simple...
You DON'T need to EQ at all. Just remember however, the criteria for NOT needing a playback equalizer are:
I have NEVER found these criteria met in any transceiver! Plain and simple! I have seen a few transceiver's who's receiver was very flat and wide enough, but they fail the transmitter criteria
for reproducing enough flat frequency response. This is why we all NEED a playback EQ system if we really want to transmit a faithful reproduction of the original recorded source.
Even with all of this taken care of and in the best of scenario's, the signal to noise will be doubled as any QRN, QRM and band phasing distortion present in the original recording, will be added again during the playback to the receiving station that you recorded! Recordings made during stable band conditions, low QRM / QRN and at high signal levels are the perfect time for a great recording session. If these conditions are not met, you may want to put your recording on hold for better conditions or a different band. Equalizer Settings: Figuring out how to set up the playback equalizer will require some simple transmitter tests. The most quantitative and scientific approach would be to measure the power output
of the transmitter when excited with different frequencies. For these tests, you will need a tone or audio sweep generator. I use the one provided in my recording software (Cool Edit 2000). Many software based recording and analysis
programs have these generators built in.
Here is an outline of how to test your transmitter frequency response:
POWER in watts = Resulting Gain/Attenuation
If you have set up your playback equalizer properly, and you have sufficient bandwidth that equals the original audio bandwidth from the transmitting station, you should be able to play them back
with deadly accuracy! Just remember, your receiver MUST record them flat and wide enough to begin with or the show is over!
|
| Now that your recording EQ has been adjusted, it's showtime! The only comments I have is regarding playback gain levels. An EQ'd playback can test the limits of your transmitter. So, be very careful
with your playback gain so that you do not cause transmitter distortion. You may notice that you cannot DRIVE your transmitter's ALC as aggressively as you can with your live mic audio. I find the opposite, but every circumstance is different.
You will need to experiment with levels that work the best in your environment.
|
| Summary
If you need some assistance in determining if your playback system is working correctly, or if you would like to test it out with someone who has a spectral analyzer on the air, I would certainly
be willing to make a schedule with you and assist in any way I can. Drop me an e-Mail and we'll set something up.
One final note regarding on-air playbacks; The FCC requires that we get permission from the amateur station that was recorded to retransmit their audio on-the-air. Also note that the FCC forbids retransmission from any sources other than that of amateur radio, including commercial broadcasts and music. Have fun and may your recordings and playbacks accurately reflect the spirit of those you have recorded! -John (NU9N) |
| John M. Anning - NU9N
e-Mail: |
Apologetics 1 | Apologetics 2 | Audio Glossary | Donate | eSSB Mods | eSSB Ready Rigs | Transmitter Settings for eSSB
File Downloads | News | Radio Connections | Transmitter Settings | Scope Your Audio | Site Map | Site Search | T-Pad Calculator